 Save
Save My oven timer went off just as a neighbor knocked, and when I opened the door, the smell of toasted cheese and paprika spilled into the hallway. She asked what I was making, and I handed her a spear straight off the pan. She bit through that shatteringly crisp crust and said nothing for three seconds, just chewed with her eyes closed. That is exactly the reaction these asparagus spears deserve every single time.
I made these for a spring dinner party where I had promised something impressive but had zero time. I coated the spears in the afternoon, slid them into the fridge on the baking sheet, and forgot about them until twenty minutes before everyone showed up. When I pulled them out golden and crackling, my friend assumed I had ordered them from a restaurant. I did not correct her until dessert.
Ingredients
- Asparagus: Pick medium to thick spears because they stay tender inside without turning to mush under high heat, and they are sturdy enough to handle the breading without snapping.
- All-purpose flour: This is your first layer of insurance so the egg has something to cling to instead of sliding right off the spear.
- Egg and milk: Whisking them together creates a sticky, smooth wash that holds the panko like glue.
- Panko breadcrumbs: These Japanese-style crumbs are airier and crunchier than regular breadcrumbs, and they brown beautifully without getting soggy.
- Asiago cheese: Its sharp, nutty flavor melts into the crust and crisps up at the edges, adding both richness and texture.
- Parmesan cheese: Optional but worth it for an extra salty punch and a deeper golden color.
- Garlic powder, onion powder, smoked paprika: These three seasonings build layers of savory warmth without overpowering the cheese or the asparagus itself.
- Black pepper and sea salt: Freshly ground pepper adds a little bite, and salt wakes up every other flavor in the coating.
- Olive oil: A light drizzle before baking encourages the panko to crisp up and turn golden instead of staying pale and soft.
- Lemon wedges: A squeeze of acid cuts through the richness and makes the asparagus taste even brighter.
- Fresh parsley or chives: A handful of green herbs scattered on top makes the whole plate look alive.
- Red pepper flakes: Just a pinch adds a gentle heat that sneaks up on you in the best way.
Tired of Takeout? 🥡
Get 10 meals you can make faster than delivery arrives. Seriously.
One email. No spam. Unsubscribe anytime.
Instructions
- Preheat and prep your pan:
- Set your oven to 425°F and line a baking sheet with parchment paper, then drizzle or spray it lightly with olive oil. This keeps the bottoms from sticking and helps them crisp up evenly.
- Trim the asparagus:
- Rinse the spears under cold water, pat them completely dry with paper towels, and snap off the woody ends where they naturally break. Wet asparagus will not hold the breading.
- Set up your breading station:
- Line up three shallow bowls: one with flour, one with the egg whisked smooth with milk, and one with the panko mixed with Asiago, Parmesan, garlic powder, onion powder, paprika, pepper, and salt. This assembly line makes coating fast and tidy.
- Coat each spear:
- Roll a spear in flour and shake off the excess, dip it into the egg mixture until fully coated, then press it into the panko blend, turning gently so every side is covered. Work in batches so the breading does not get soggy.
- Arrange on the baking sheet:
- Lay the coated spears in a single layer with a little space between each one so air can circulate. Crowding them will steam the coating instead of crisping it.
- Drizzle with oil:
- Pour the remaining olive oil over the spears or spray them lightly, then turn each one gently to coat all sides. This step is the difference between pale and golden.
- Bake and turn:
- Slide the pan onto the middle oven rack and bake for 10 to 14 minutes depending on thickness, flipping halfway through so both sides turn crispy and bronze. Thin spears need 8 to 10 minutes, medium need 10 to 12, and thick need 12 to 14.
- Optional broil:
- If you want an even deeper golden crust, switch the oven to broil for 1 to 2 minutes at the end. Do not walk away because they can go from perfect to burnt in seconds.
- Finish with cheese and garnish:
- Pull the pan out and immediately sprinkle the remaining Asiago over the hot spears so it melts slightly. Add a pinch of salt if needed, then scatter parsley or chives and red pepper flakes on top.
- Serve hot:
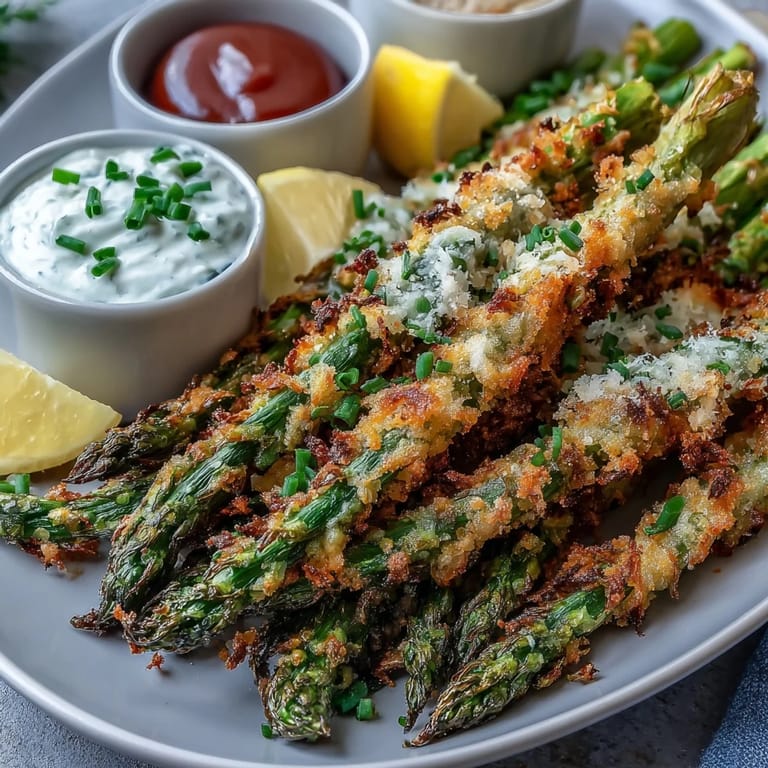
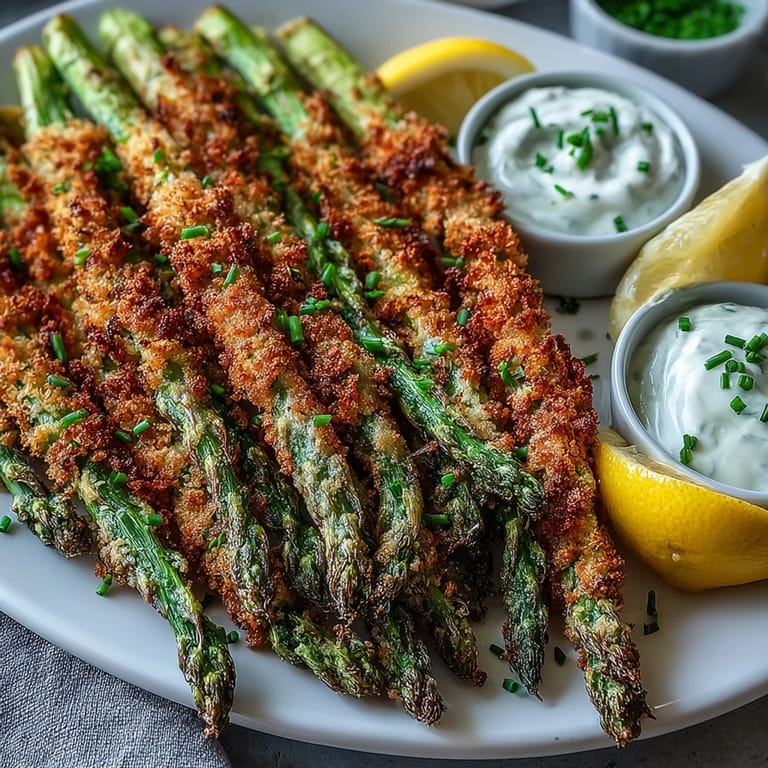
- Arrange the spears on a platter with lemon wedges and your favorite dipping sauce on the side. They are best eaten within ten minutes while the crust is still crackling.
 Save
Save The first time I served these at a family gathering, my cousin ate six spears standing at the counter before the rest of the meal was even ready. She said she could not stop because the contrast between the crunchy crust and the tender asparagus was too good to put down. I took that as the highest compliment and have made them for every spring dinner since.
How to Pick the Best Asparagus
Look for spears that are firm and straight with tightly closed tips, because once the tips start to flower or spread, the asparagus is past its prime. Medium to thick spears work best for this recipe because they hold up under the breading and baking without turning limp. Avoid any bunches with slimy ends or wrinkled stalks, and if you can, snap one in half to check that it breaks cleanly instead of bending.
Make-Ahead and Storage Tips
You can coat the spears up to four hours ahead and store them on the baking sheet in the fridge, covered loosely with plastic wrap. When you are ready to bake, pull them straight from the fridge and pop them into the preheated oven, adding an extra minute or two if needed. Leftovers can be refrigerated for up to two days, but they lose their crunch, so I recommend reheating them in a 400°F oven for five minutes to crisp them back up.
Serving Suggestions and Variations
These spears are perfect alongside roasted chicken, grilled steak, or a simple pasta dish, but they also work beautifully as an appetizer with aioli or lemon-garlic yogurt sauce for dipping. If you want to switch things up, try adding a teaspoon of finely grated lemon zest to the panko mixture for a bright citrus note that cuts through the richness of the cheese. You can also swap the Asiago for Gruyere or aged cheddar if that is what you have on hand.
- Serve them on a platter with a variety of dipping sauces like marinara, ranch, or spicy mayo so everyone can choose their favorite.
- For a gluten-free version, use gluten-free panko and swap the all-purpose flour for a gluten-free blend.
- If you have an air fryer, cook the coated spears at 390°F for 7 to 10 minutes, flipping halfway, for an even faster and crispier result.
 Save
Save Every time I make these, I remember that spring dinner when my neighbor stood in my doorway and closed her eyes after the first bite. That is the magic of a recipe that delivers exactly what it promises: crispy, cheesy, and impossible to stop eating.
Recipe Questions & Answers
- → What makes the coating so crispy?
The combination of panko breadcrumbs and Asiago cheese creates an exceptionally crunchy exterior. Panko's larger, flaky texture crisps up beautifully in the oven, while the cheese melts and browns for extra crunch and flavor. Drizzling with olive oil before baking ensures even crisping.
- → Can I make these ahead of time?
Yes! You can coat the asparagus spears up to 4 hours in advance and refrigerate them on the baking sheet. Bake just before serving for the crispiest results. Leftovers can be reheated in a 400°F oven for 5-7 minutes to restore crunchiness.
- → What thickness of asparagus works best?
Medium to thick asparagus spears hold up best during breading and baking. Thin spears may become overly tender and difficult to handle. Look for spears about ½ inch in diameter for the ideal texture contrast between crispy coating and tender vegetable.
- → Can I use an air fryer instead?
Absolutely. Cook at 390°F (200°C) for 7-10 minutes, turning halfway through. Air frying yields excellent results with less oil. Work in batches if your air fryer is small to maintain proper air circulation for even crisping.
- → What dipping sauces pair well?
Lemon-garlic aioli complements the rich coating beautifully. A cool yogurt sauce with lemon and fresh herbs provides contrast. Marinara offers a classic Italian-inspired pairing, or serve simply with extra lemon wedges to brighten each bite.
- → Can I make this gluten-free?
Yes, substitute gluten-free all-purpose flour for regular flour and use certified gluten-free panko breadcrumbs. The coating technique remains the same, and the texture will still be wonderfully crispy and golden.